喝杯 Mocha 輕鬆打造 Node.js 的 TDD 生產線
七月 25, 2016
一群人協作就是要測試一下

前言
最近在公司導入 TDD,因此將這段程過記錄免得未來不記得怎麼設定。
先說我很愛 TDD (Test-driven development),簡單幾點原因:
- 簡單化 - 執行對應指令既可確認 API 輸出入的正確性
- 清單化 - 每寫一個測試 = Checklist 多一個確認項目
- 可重覆使用
基於以上 3 點再撘配 Grunt、Gulp、Webpack 做流程的控管,過去許多煩雜的事情都變得如此簡單,例如要 ESLint 檢查 code,通過再進行測試 API,最後產出 API 文件。
事前說明:
- 本篇使用 Mocha 實作 TDD
- 在公司分享的簡報連結放在文中最後的參考資料,需要的請內取
開始手動
事前準備
方法一
- 執行
npm init - 執行
npm install --save express - 執行
npm install --save-dev supertest should - 執行
npm install -g mocha
方法二
- 執行
git clone https://github.com/IvanWei/tdd-example-express.git - 執行
npm install - 執行
npm install -g mocha
架 express Server
- 在根目錄新增一個 app.js 並將下面程式碼貼上後存儲
1 | const express = require('express'); |
- 執行
node app.js可以 Terminal 上可以看到下面的畫面,此時瀏覽器連localost:3000可以看見 Hello World! 既表示 HTTP 連線正確
設定 mocha
- 新增存放測試檔案的資料夾
- Demo 將其存放在
./test/spec裡,之後範例都會以這為主要路徑 - 沒建立過,可以下
mkdir -p ./test/spec幫忙建立
- 在
./test新增mocha.opts - 設定 Timeout 時間、啟動時預先載入的 Library、app.js 等,以下是 Demo 的設定
1 | --timeout 500000 |
- ui 採用 bdd 方式撰寫以使用情境為出發點,此處也可以換成 tdd,但接下來的 Demo 會以 bdd 方式進行
寫個測試試試
- 設一個 Object 內容如下
1 | const contents = { |
- 測試條件如下,比對 contents 的型態和裡面的內容
1 | describe('contents is an Object,', () => { |
- 執行 mocha 測試
1 | mocha test/spec/demo.spec.js |
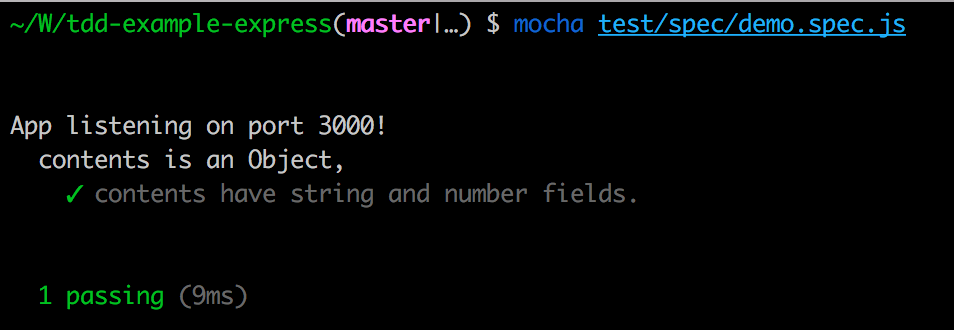
執行完畢後會看到下面成功畫面

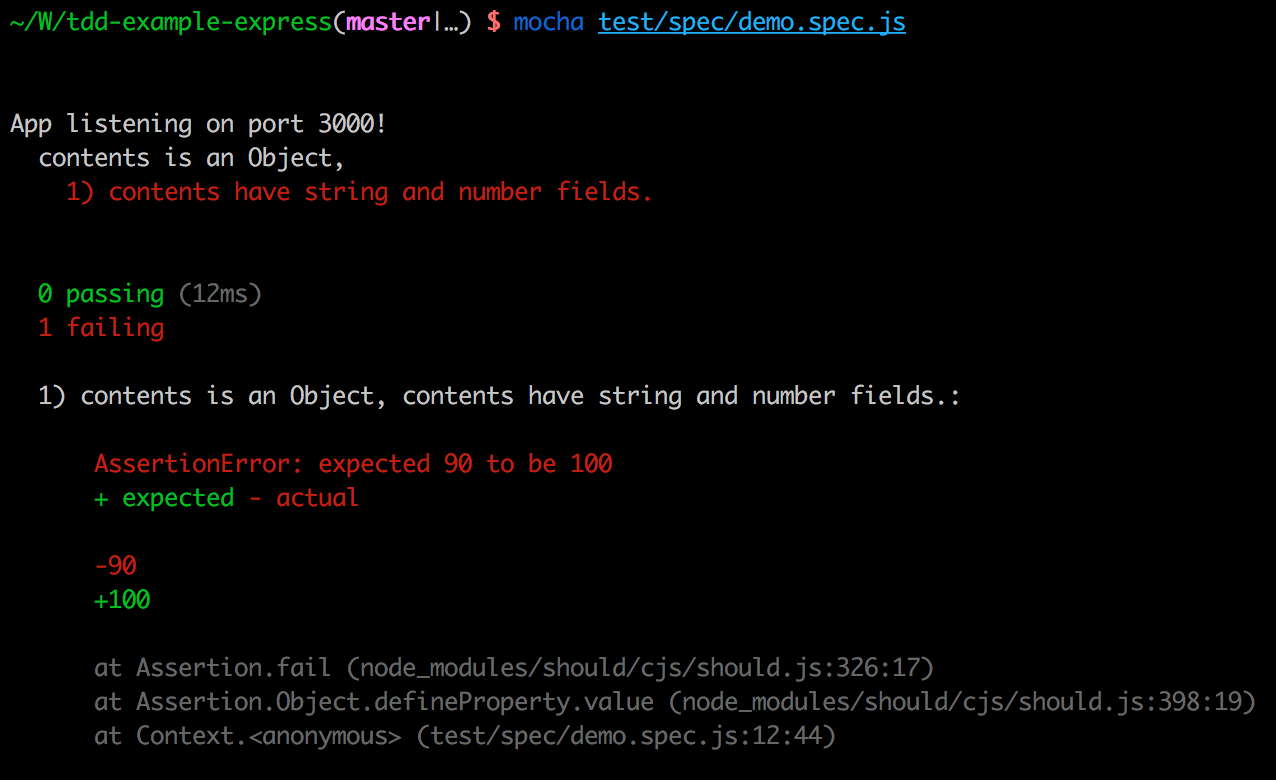
- 再來將 contents 的 number 改個值
1 | const contents = { |
- 再執行一次 mocha 進行測試,此時會看見 mocha 回傳的錯誤畫面

以上就完成基本 mocha 的 TDD 測試。
如果要測試 Sequelize.js 和其他 Server 端的服務,測試方式和前面教得雷同,將上面的 contents 改為回傳的 result 即可。
接下來說明接口 API 的測試方式
API 測試
- 安裝 supertest
1 | npm install --save-dev supertest |
- app.js 加入 supertest,並設為 global
1 | const express = require('express'); |
- test/spec/demo.spec.js 加入 API 的測試
1 | describe('Test API,', () => { |
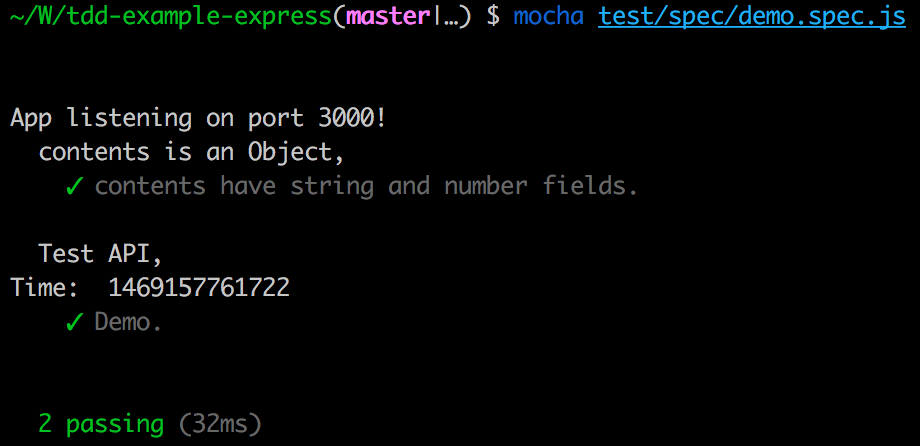
- 執行 mocha 測試,這次會多一個 API 的測試結果
1 | mocha test/spec/demo.spec.js |
註:API 測試和實際前端送 request 的方式相同,主要歸功於 supertest。

參考資料
- 文章標題: 喝杯 Mocha 輕鬆打造 Node.js 的 TDD 生產線
- 文章連結: https://blog.ivanwei.co/zh-tw/2016-07-25-getting-started-with-expressjs/
- 版權聲明: CC BY-NC-ND 4.0